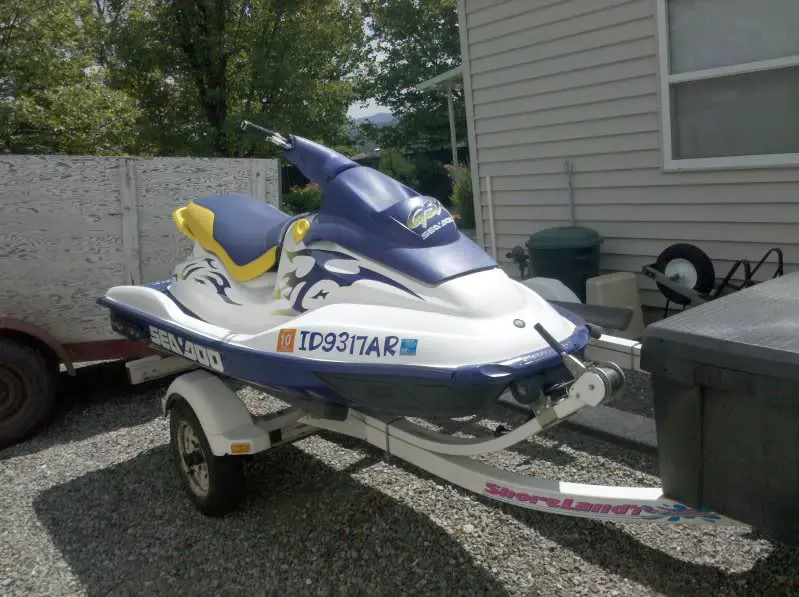
One of the best parts about owning a jet ski is going fast. The acceleration forwards on the jet ski, and the wind in your face is an experience that few things can match. The speed, agility, and fun that jet skis offer are intense and great rides. So why would anyone want to add reverse to their jet ski? There are several reasons why you would wish to the reverse function on your jet ski, and this article will help you to understand why adding reverse to your jet ski can be beneficial and also how it can be done.
Can you add reverse to jet ski? Yes. Adding reverse to your jet ski is more common than you think. The addition can be done at home for around $300 with the parts shipped to your home. The modification of adding reverse takes about 4 hours to complete. It is done by removing the steering system to get access to the fiberglass hull and installing a reverse lever, then feeding the wiring for the reverse foot lever to the engine gears box.
How To Add Reverse To Your Jet Ski
Adding reverse to your jet ski can be done at home for around $300 or so depending on if you can find used parts or if you have to buy some or all brand new and 4 hours of work.
The easiest way to add reverse would be to find a like or identical ski that came with reverse. For example, a 1996 SeaDoo XP does not have reverse, but a 1996 Seadoo GTX does. You can buy the ski used and pull all of the reverse gear off of it. Now put it on your ski and your ski has reverse. Easier said than done. Below is a guide to add reverse.
These jet skis above share much of the same parts, but if you are looking at your ski and it is different, you will want to find the same brand of ski you have in a model with reverse. By checking to see if the jet pump and components are identical, all you would need to get is the reverse gate, hardware, and cable.
For example, here is a parts list and guide for a Yamaha ski, you will need to order the following parts and have the following tools to complete the upgrade:
Materials Needed:
- 1 D3-52358-00-00 SPRING, RETAINER
- 1 6D3-R1314-00-00 GATE, REVERSE
- 2 90119-06858-00 BOLT, WITH WASHER
- 1 90119-069UX-00 BOLT, WITH WASHER
- 2 90119-089UF-00 BOLT, WITH WASHER
- 2 90151-05802-00 SCREW, COUNTERSUNK
- 4 90201-06801-00 WASHER, PLATE
- 6 90267-489U6-00 RIVET, BLIND
- 1 90387-06M30-00 COLLAR
- 2 90387-08M30-00 COLLAR
- 2 9538R-06600-00 NUT
- 1 EU0-U1461-02-00 STUD, JOINT BALL
- 1 F1K-6149C-00-00 CABLE,REVERSE
- 1 F1K-U1316-01-00 PLATE, STOPPER
- 1 F1K-U1336-00-00 DAMPER, STOPPER
- 1 F1K-U134A-00-00 REMOCON. LEVER ASS
- 1 F1K-U1467-11-00 BRACKET,STOPPER CA
- 1 F1K-U146G-00-00 PACKING, CABLE
- 1 F1K-U2714-02-00 GRIP,HAND
- 1 F1K-U826C-01-00 BRACKET
Tools Needed:
- Ratchet
- Drill Gun
- Rivet Gun
Step #1: Source your parts
First off, you will want to source your parts either from a parts jet ski you find off of Craigslist, or finding each part off of eBay or other parts sites.
Step #2: Remove Items from Jet Ski
Next, you will want to remove items from the jet ski so they don’t get in the way. Remove the seats, storage bins, and anything that can hinder your movement when installing reverse.
Step #3: Find your Route
Now that you have a clean slate, you will want to find the best route to lay the reverse cable. This will be one of the hardest parts to run as it will involve drilling in the hull. Along with finding your route, figure out where you want your reverse lever mounted.
Step #4: Install Reverse gate onto jet pump
If your exit nozzle and pump are compatable with a reverse gate, this it the time to mount it. If not, you would have purchased a nozzle that has a gate on it. You will need to mount this to your jet pump. Many jet pumps are similar and this will be an easy task.
Step #5: Drill Hull for Cable
Now you will need to drill a hole in the hull to allow the reverse gate cable to exit to attach to your installed gate. Line up your reverse gate to find the best location for a cable. This is generally in line with the hookup ball on the gate.
Drill the hole to the size of the grommet that you have included with your parts.
Step #6: Installing Bucket & Spring To Reverse Cable
Put together the reverse bucket and attach it with the spring. Install a ball joint to the bench and connect it to the reverse cable. Install the hardware for the spring. 17. Assemble the reverse bucket & attach. (Do not forget the spring otherwise, the bucket continues to drop down while you’re riding it). a. On the bench, you can install the ball joint, which attaches to the reverse cable, and you can install the hardware for the spring. Put the bucket onto the housing for the jet with two bolts and spacers. Next, slide the outer part of the reverse cable back, install it, and release it. Hook your spring around the pump housing and the hardware of the bucket. The bucket should lower when the lever is pulled backward and should stay upright when the bar is pushed forward.
Step #7- Install Reverse Cable
There will be a retaining clip for your reverse cable and grommet that mounts to the hull. It is time to install this so the reverse cable does not move when you move the lever. This needs to be sealed properly as it can allow leaks to get into your hull.
Step #8- Install Reverse Handle
Now that you have your pump and cable complete, it is time to install the handle. The easiest place is to install it in a similar location to the jet ski you pulled your parts off of. You will want it easily accessible so you don’t have to scramble when you have to use it.
You will probably need a drill and Dremel and some rivets to mount this depending on your jet ski.
Conclusion
It is really hard to detail in writing how to install this. If you have a parts ski, it is much easier to figure out as you just have to uninstall off of your parts ski and reinstall on to the jet ski you want to install reverse on.
This is best to do as a winter project as you may have to source more parts than you originally thought to make it work properly.
If you order the correct parts and follow these instructions, it is possible to install the reverse on your jet ski. The reverse is an excellent function for the jet ski, but make sure not to tip over as you first learn how to back up!
