
If you own a Sea-Doo, you may have to replace its gas tank at some point. Sometimes the gas tanks on Sea-Doos can get damaged, punctured, contaminated, or worn down. Removing a Sea-Doo’s gas tank can seem complicated if you are unprepared.
To remove a Sea-Doo’s gas tank, you should be aware of the multiple steps beforehand. You will have to take apart or remove a few different components to reach the gas tank and successfully remove it. This process is different for various Sea-Doo models. Read on to learn how to remove a gas tank from a Sea-Doo in six steps.
1. Siphon Any Gas out of Your Sea-Doo
First, you will need to siphon any gas from your Sea-Doo’s gas tank. Doing so will make it much easier to remove the gas tank when you get to that step. Siphoning the gas out of a Waverunner involves the use of a tube and a spare tank for the gas to fall into. We have used this pump in the past and it works great.
When you siphon, you rely on gravity. When you draw liquid up through a tube and then lower the tube below the initial reservoir, surface tension and gravity work together to draw the liquid out of the above reservoir and down into the tank below. Use this tactic to drain the gas from your tank so that it is not extremely heavy and difficult to remove.
All you will need to siphon your tank is a tube and a spare tank. Your Seadoo will likely be sitting a few feet above the ground. Feed one end of your tube (preferably a rubber hose) into your Sea-Doo’s gas reservoir. You will then have to draw the gas out of the tank through the tube.
You can either use a pump to do this, or you can attempt to draw it out with your mouth as if the tube were a straw. The second way is not recommended because you could wind up with a mouthful of gasoline. Once you have drawn a bit of gas out of the tank, lower the tube into the extra tank below. Gravity will do the rest of the work. Ensure that the fuel level is a low as possible before moving on to the next step.
2. Remove the Seat and Jet Pump
Removing the seat is the easiest step in this entire process. The manufacturers of Sea-Doo make it simple and fast to remove seats for easy access. Most Sea-Doos seats can be removed by:
- Pressing a lever to flip the seat upwards
- Pressing one of two levers to pop the seat off entirely
Once you have removed the seat from your Sea-Doo, you will be able to access the electrical cables and other parts of the Sea-Doo. The next thing you will need to remove is the jet pump. The jet pump is the impeller on the back of the Sea-Doo.
You will need to remove the jet pump and disconnect its lines so that the alignment of the jet pump and the engine do not get messed up when you remove and replace the engine. It is better to just remove the jet pump to avoid these issues.
You can remove the jet pump by unscrewing several screws on the jet pump cap. Once it comes loose, disconnect the lines and put the jet pump aside. You can now begin to work safely within the Sea-Doo (where the seat was).
3. Disconnect and Remove the Sea-Doo Battery
In order to be able to pull the entire fuel tank out, you will need to remove the Sea-Doo’s engine. The following steps will allow you to reach the engine so you can remove it easily and successfully. Before you do anything else, you have to make sure your engine is completely powered off.
First, you will need to disconnect and remove the battery. This will require you to remove the black ground wire and then disconnect any other electrical connections that you see connecting to the battery. Once all connections have been disconnected from the battery, pull it out and put it aside.
Be sure to set your removed battery and its parts on some rubber or a wood platform so that it does not drain while you are working on the fuel tank.
4. Disconnect Any Lines, Hoses, or Pipes That Connect to the Engine
The next step is to remove the engine. To pull the engine out of your Sea-Doo safely, the engine must be free of any connections. These connections can include:
- Lines
- Pipes
- Hoses
- Other connections
Disconnect any pipes you see by unscrewing them from their pipe caps. The main exhaust pipe will be the first thing to remove. This requires you to disconnect a few different tubes and wires. Once you disconnect these, you can unscrew the main pipe from its pipe cap and proceed to the next step.
Make sure to label any wires or hoses so you remember where they need to be replaced.
You will also need to disconnect any water lines from the engine. These are typically located on the exhaust manifold. Next, disconnect oil lines from the crankcase. Some oil will likely spill while you do this. Make sure you have towels or old rags on hand to clean up in the case of a mess.
5. Disconnect Engine Plates and Remove Engine
The last step to removing the engine from your Sea-Doo is disconnecting the engine plates from its motor mounts. You can do this by simply unscrewing the bolts. Make sure that you are keeping track of which bolts and screws go where, and keep them in a safe place, so they do not get lost. This is so you can easily replace them correctly.
Once all connections have been disconnected from your engine, you can then remove the engine from the Sea Doo watercraft. Be sure to place the engine in a safe, dry place. While you have the engine removed, you will also want to inspect the engine and interior of the Sea-Doo for any damage or bending that you may have caused during this process.
This process will require removing a lot of loose parts, such as bolts and tubes. Take notes regarding which bolt and tube go where so that you remember their correct positions. It can be difficult to keep track otherwise.
Group different types of bolts and label their location with a sticky note. This will make the reassembly process much easier and less of a headache since you will not have to rely solely on your own memory.
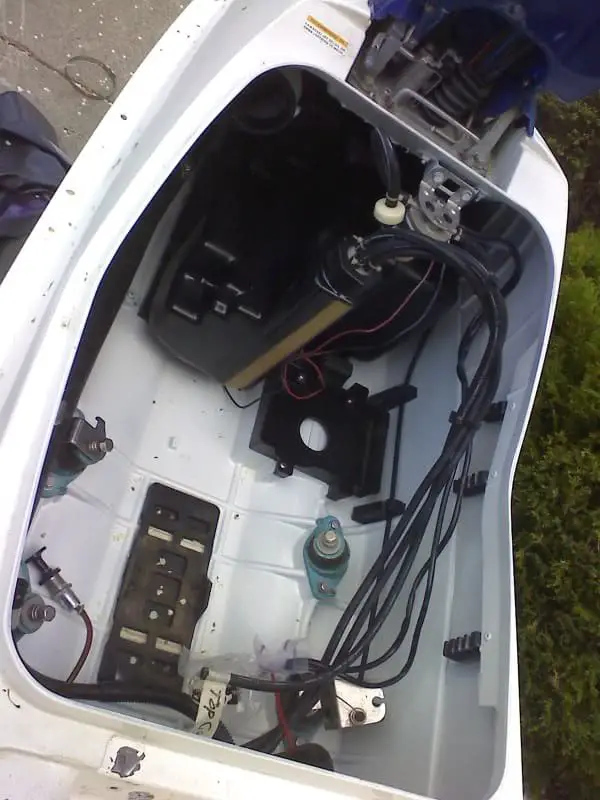
6. Move Anything Else Out of the Gas Tank’s Way to Remove the Tank
Depending on the make and model of your Sea-Doo, you will have to remove different things before you can access the gas tank to fully remove it.
- Some Sea-Doos require you to remove the sender unit from within.
- Others require you to move the steering unit.
- Other models will require you to remove the baffle.
Once there is a clear path for your tank to slide out of, you will need to disconnect any remaining pumps that are connected to the tank. If the tank is secured or screwed down, you will need to disconnect these screws and store them in a safe place.
Many Sea-Doo models will require you to slide the tank forward and maneuver it out of the space. You will rarely be able to just lift the tank out. Removing a fuel tank from a Sea-Doo is one of the most difficult items to remove, so if you have made it this far, good job!
Once the fuel system is fully removed, you can service it, clean it, replace it, or do whatever you need to do with it. When you are putting your Sea-Doo back together, be sure to use the correct bolts and connect the correct lines so that your Sea-Doo will function as it should.
Older Sea-Doos Gas Tank Removal
If you have an older Sea-Doo, you may be able to fit the gas tank out of the front hatch. Watch this video for more:
Conclusion
We hope that these 6 steps will help guide you through the journey of removing your gas tank from the jet ski. Remember to keep everything as organized as possible so that re-assembly is easy breezy! We hope your back out on the water enjoying your Sea-Doo watercraft in a jiffy!