
Whether you have an old jet ski, or just do not like the current condition of your jet ski, painting the exterior can have a multitude of benefits outside of just changing the actual color. Painting a jet ski is a great way to update the outside look of your jet ski’s current paint job to make it look more modern and protect the outer layer of the hull..
Sometimes a paint job can be needed, while other times it is just something that is preferred. Whatever your reason may be, it is possible to get it done either professionally or as a do it yourself project! This can be a good investment for a jet ski owner, as it will make your jet ski last longer and cause its resale value to go up.
I painted my old Kawasaki 650 and it was a fun project and it really changed the look of the ski. I was able to get the project done pretty quickly and even pulled everything out of the hull and painted the inside of the hull bright white as well.
Reasons to Paint a Jet Ski
Painting a jet ski can be done for a number of reasons. Most often, if someone is painting a jet ski it is because they are wanting to change the look by altering the color or design. Especially if you have an old jet ski that has yellowed with age or sun damage, this can instantly change the look of your personal watercraft.
Repainting a jet ski also has protective benefits, as it will shield your jet ski from the possibility of future scratches and water damage. If your jet ski’s paint is either damaged or peeling, repainting it is a good solution to solve these problems and prevent any issues that may arise in the future.
Getting you Jet Ski Professionally Painted
People who are considering painting their jet ski have two options: they can contract out the work to a professional body shop or they can attempt to complete the job themselves. This will often depend on personal preference, the amount of time that is available to someone, and if it will match the jet ski owner’s budget. For some, having your jet ski painted by a professional is the best option.
If you are wanting to get your jet ski professionally painted, almost any body shop in your area will be able to get it done for you. You can also check with local jet ski and outdoor boating stores to see if they will be able to do it or recommend a specific company that will be able to get it done for you. Usually, they will have connections for reputable shops that perform these types of services.
There are a number of factors that will go into deciding how much a paint job will cost, such as the size of the jet ski and the complexity of the paint job that is being asked for. The bigger the jet ski and the more complicated the paint job will cause the price to jump significantly. Other factors, like labor and the amount of time that you are requesting it be completed in, will affect the price as well. If you are needing the job to be completed quickly or if the job requires more elbow grease in terms of labor, the price will also jump.
When it comes to the cost of having your jet ski painted professionally, depending on all of the factors that are listed above, a jet ski owner is probably looking at spending about $500 to $2,000 for this service. Make sure to do your research and get different quotes from a variety of body shops to compare prices and get the best deal. However, getting the best deal does not always mean that your paint job will be done satisfactorily. You will want to go with a reputable company that is well reviewed and recommended by others.
The Cost of Painting a Jet Ski Yourself
As with the factors that contribute to the cost of professionally painting a jet ski, there are a number of factors that will affect how much it will cost you to paint your jet ski by yourself. However, this number will be much lower than any professional paint job you will be quoted for.
Depending on the type and amount of paint, as well as rental costs for machinery, a jet ski owner is probably looking to spend somewhere between $100 and $200 in order to do a proper paint job. It will also require some hard labor and a few days time.
The Step by Step Guide to Painting your Jet Ski
What to do Before You Start
You will need to make sure that you have an enclosed area that you will be able to access for a few days. Having an enclosed space ensures that no outside dirt will affect the finish on your paint job. Because of the size of a jet ski, this can easily be done inside of a garage. You will also want to make sure that the area is well ventilated, as using a paint gun will cause particles to go into the air that will need to find a way out of the space.
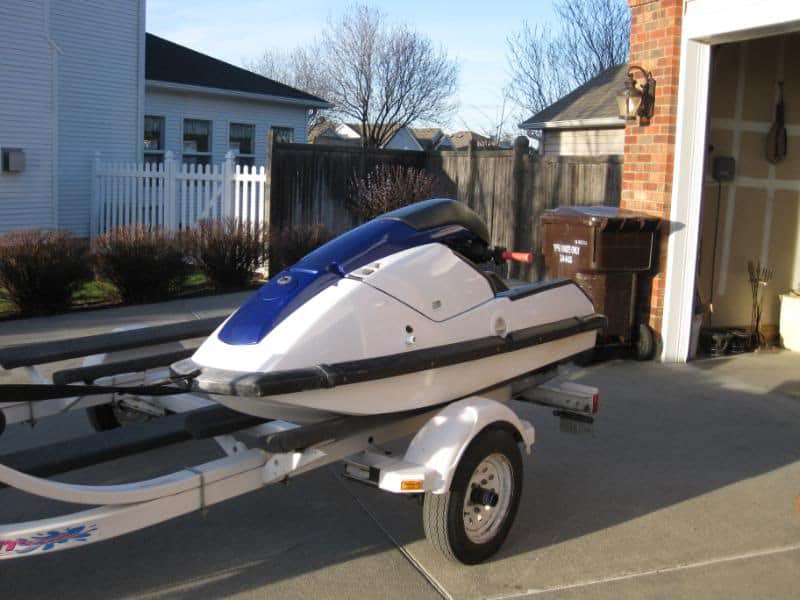
You will also need to locate, rent or create a mount to hold up the jet ski while you are painting it. It is not ideal to paint your jet ski while it is on its trailer, as the paint job could stray and accidentally paint the trailer itself. You will want the jet ski off of the ground and in a stable position while you are working around it to paint everything you need to. You will want to make sure that this mount is acceptable for possibly receiving extra paint that may be a result of the paint job.
Materials You Will Need to Paint your Jet Ski:
Before you begin the project, you will want to make sure that you have everything you need, and it has been accounted for. There is nothing worse than being in the middle of a project with paint ready to go and realizing that you do not have everything you need!
Head to your local home improvement store or automotive paint shop to pick up the supplies on the following list. Many of the professionals that work at the store will be able to assist you in picking out the proper materials for this specific job.
- Painter’s Tape – This will be used to tape off any of the sections on the jet ski that you do not want to have touched by the paint. Invest in a good quality painter’s tape, as lower end materials may not stick as well and may let paint get underneath to those unwanted areas.
- Paint – Talk to a paint professional at the store about which paint would be best for this project. Not all paints will be able to stick to the slick exterior of a jet ski, so you want to make sure that the paint you choose will hold up over time and adhere to the surface well. Also invest in good quality paint for these same reasons. I used an appliance epoxy on the bottom of the hull as I constantly beach my ski. It held up well.
- Primer – You will want to purchase a primer that will be used before the actual paint. While this does add an extra step to the painting process, it will make a load of difference in the long run as it will help the paint job go more smoothly.
- Painting Mask – Due to the nature of using a paint gun, particles can get into the air that could be inhaled by the user. Having these chemicals get into your systems should be avoided at all costs, as it could lead to unnecessary illnesses. They are relatively cheap at the store, and will save you lots of negative effects in the long run.
- Newspaper – This will be used along with the painter’s tape to section off any areas that you do not want to receive paint, such as the seat and mats.
- Paint Gun – This will be the main tool to apply the paint, as it will allow for a more even finish that does not contain brush marks or uneven patches. If you do not want to invest in a paint gun, these tools can often be rented at many of the major home improvement chains or paint shops.
- Clean Shop Towels – Having clean shop towels will help in removing any residue that may be built up on the surface of the jet ski. Dirty shop towels may not remove as much residue, possibly moving it around instead and smearing the surface.
- An Electric Sander – This will be a great investment that will help to save your arm from the grunt labor involved in preparing the surface for painting. It will be much easier to remove the paint and smooth the surface than it would be if simply done by hand. If you do not want to invest in purchasing an electric sander, you can rent one of these tools from many of the major home improvement stores.
- Sandpaper – You will need coarse, low-grit sandpaper for the initial prepwork of the jet ski. It will be used to take off the current paint job and smooth the surface down as much as possible to ensure that you have an even canvas to work with. You will also need to purchase higher grit sandpaper that can be used to fix imperfections in the paint job without removing the paint itself.
- A Paint Brush – This will be needed for small touch ups at the end of the project. Make sure that you get a good brush that will not leave any fibers in the paint job that you have already completed.
Once you have all of your supplies, you will be ready to start prepping the surface for your paint job!
Prepping the Jet Ski

A paint job on a jet ski is only as good as the preparation that is done beforehand. This is not going to be the most fun part of the job, and will require a lot of elbow grease. However, this is the most important thing you can do to ensure that your paint job will stick to the jet ski, rather than peeling off, dripping down or fading away over time and with use.
If you have any repair work to be completed or scratches to be filled, now is the time to do it. Follow this guide if you are new to repairing fiberglass.
Remove any decals or graphics that may have been installed on your jet ski. You will need to repurchase numbers for your license as you will need to remove them. Use goo gone or another substance to remove any residue from the stickers.
If you are replacing your mats, you will want to remove them as well. Mats are relatively cheap, so you may want to change the color or look.
Using a hose and some cleaning solutions, wash every part of the jet ski that you can, making sure to properly scrub off any dirt, grime, or built up water residue that may be present on the outside. Also do this to parts of the jet ski that you are not intending on painting, such as the seat. The cleaner the jet ski, the easier the next step will become. Make sure you pick a cleaning solution that will do the best job.
Once the jet ski is extremely clean, wiped down and completely dried, it will be time to start the sanding process. Load up the electric sander with the low-grit, coarse sandpaper. Evenly sand the surface in order to create a smooth exterior that will take the new paint easily. This will probably be the most strenuous part of the project, so give yourself time to do this in sections. You want to make sure that you do this properly to avoid any painting headaches later down the road.
Once the entire jet ski has been sanded down, you will need to clean it again. You want to remove any of the dust that was created in the sanding process so that it does not interfere with the paint sticking to the surface. Use the same cleaning solutions with new, clean towels to get it as dry and residue free as possible.
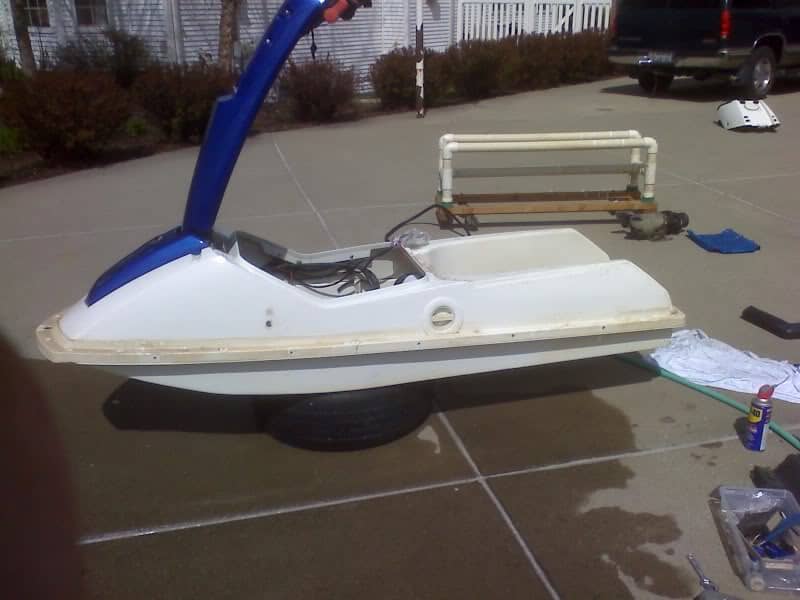
Before Cleaned Up Sanding 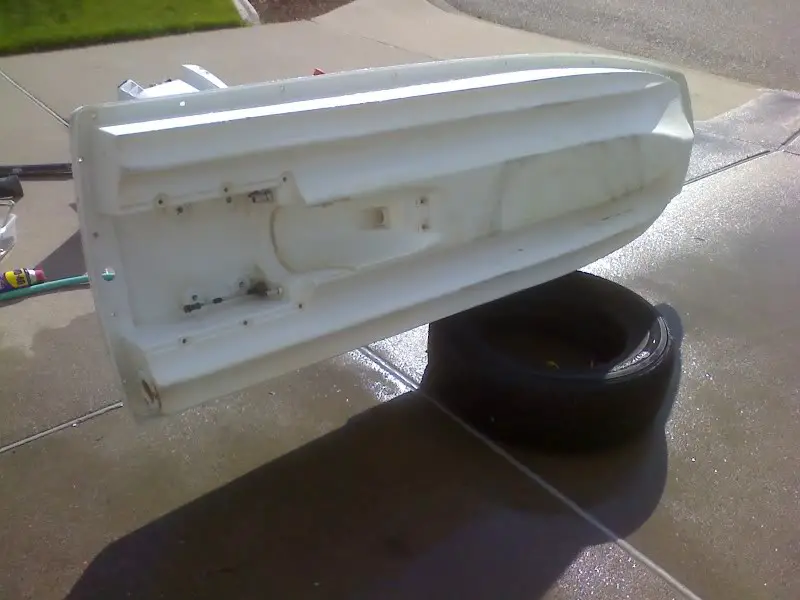
Removed Impeller 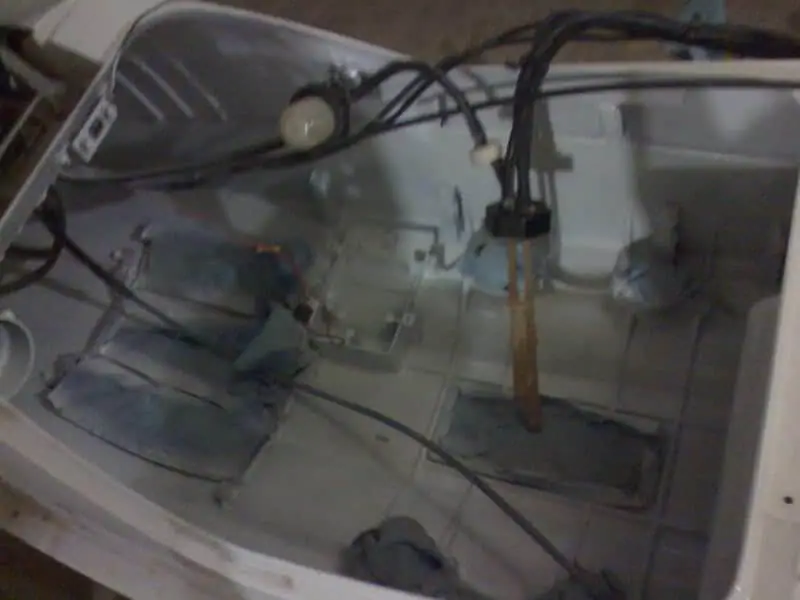
Engine Bay Masked 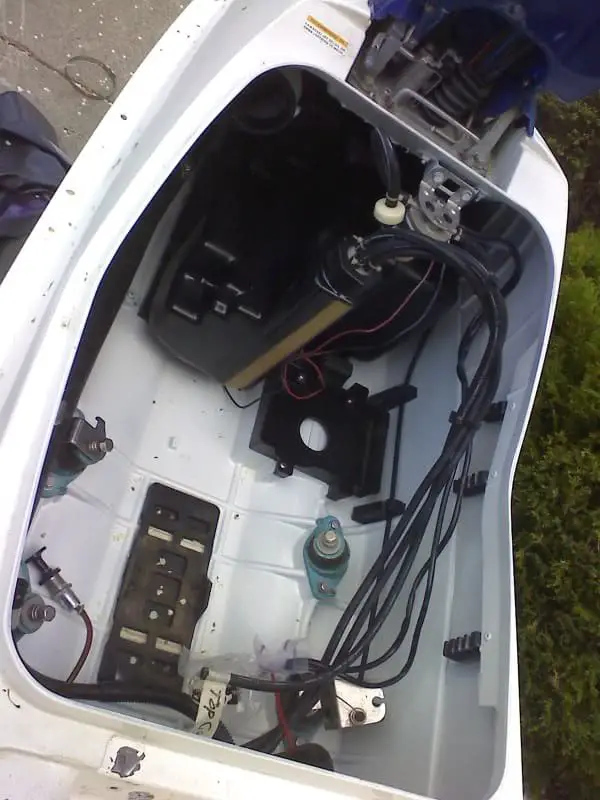
Painted Engine Bay 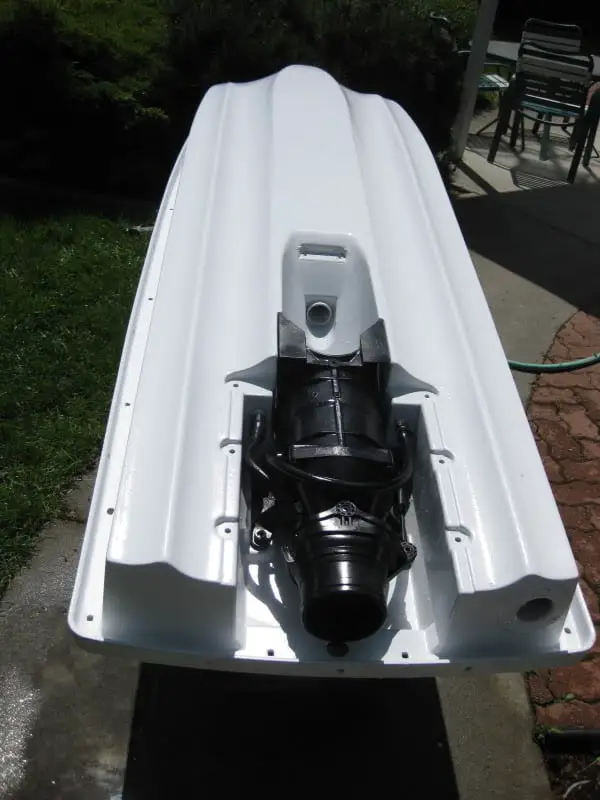
Painted Bottom of Hull 
Hull Photo Painting the Ski 
Masking and Painting 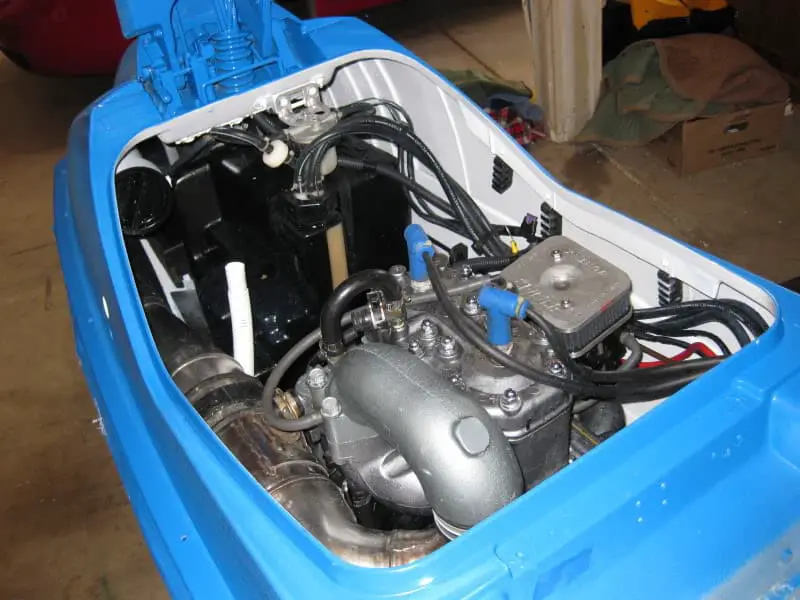
Engine Reinstalled 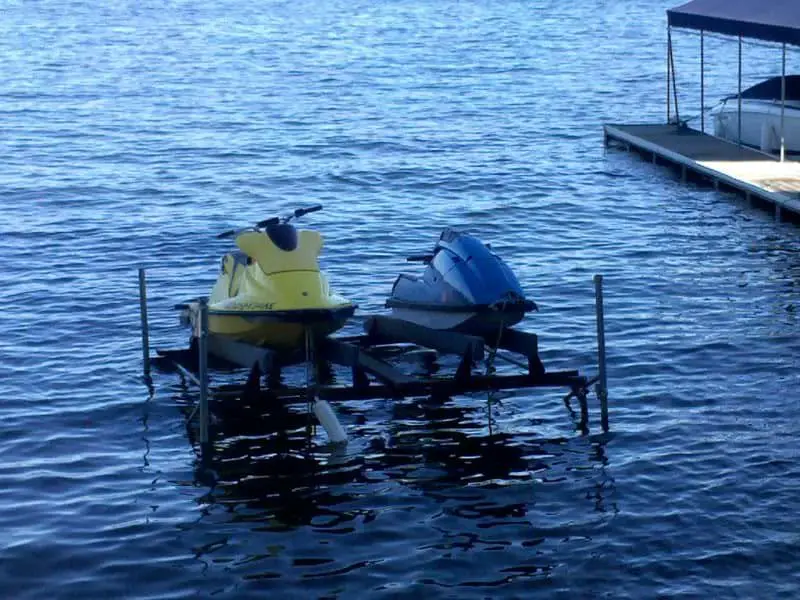
Final Job
Steps for Painting a Jet Ski
- Once the jet ski has been thoroughly sanded and cleaned, it is time to get to the actual painting process. Gather all of your materials and double check that you have everything, as it will be somewhat difficult to stop in the middle of the paint job. Once you have made sure that everything you need is ready to go, it is time to get started.
- Use the painter’s tape and the newspaper to cover any areas of the jet ski that you do not want touched with the paint gun. This will include areas such as the seat, the handle bars, and any stickers that still remain on the jet ski. It is best to be too generous with your painter’s tape, rather than use too little, as it will be much more difficult to remove any unwanted paint after the fact.
- Read the instructions on the paint gun. Make sure that you know how to use it before you get going. Not all paint guns work the same, so just because you have worked with a paint gun before does not mean that you will know how to properly use this one.
- Once you feel comfortable with the paint gun, it is time to test it out. Pour some of the primer into the paint gun. Before spraying the jet ski itself, you will want to test the paint gun on a surface that is located far away from the jet ski so that you do not accidentally paint it. Cardboard is great practice for your spray gun skills. After practicing to make sure that the paint gun is working properly, you will be ready to start painting on the jet ski.
- Begin spraying the jet ski, working from one end to the other, using long and even strokes to create a smooth and even finish.
- Once you have covered the jet ski in the primer, you will need to wait ample time for the primer to set in before starting a second coat with the actual paint. How much time will depend on the primer, so consult the instructions on your specific primer before moving on. While you are waiting, this is an excellent time to clean out the paint gun before moving on.
- If you have a sandal primer, you will want to sand down any points you may have fixed or filled to create a smooth surface.
- Once the proper amount of waiting time has been reached, fill the paint gun with the desired paint. Then, you will begin the process again, moving from one end of the jet ski to the other with even strokes.
- You will need to wait for some more time before going over the first coat with a second.
- Once you have completed the second coat, you will need to take the paintbrush and go over any portions of the jet ski that did not receive the right amount of paint. Touch up these areas, as well as looking for any imperfections in the paint job that can be fixed, such as dried paint drips. You can use the high-grit sandpaper to carefully smooth these sections out before painting over them again with the paintbrush or paint sprayer.
- Wait for a little bit to let the paint cure before removing the painter’s tape. Do this very carefully, as it is possible that removing the tape could lift the paint job off of the jet ski if it has not had time to properly adhere to the surface.
- Let the jet ski sit for a while to ensure that the paint job is completely dried. You do not want to take your jet ski anywhere that could damage the hard work that you have put in before it is the proper time to do so!
Maintaining Your Jet Ski’s Paint Job
Let your jet ski sit for as long as is specified for the specific paint that you used. While some paint may be ready to go in just a few days, other paints may require a longer time to cure. Read and follow the directions that were given to you by the paint company that you bought through. The longer you wait the longer you can ensure that the paint job will hold and not scratch or peel any time soon!
For the best results, would have used a paint with a clear coat that will protect the paint job that you have just completed. This will make it shiny and also protect it from the elements that it will be exposed to during use.
Alternatives to Painting a Jet Ski
If the cost of having your jet ski repainted professionally is too steep for you to be okay with, but you do not feel comfortable doing the job yourself, see if you can work with the body shop. As most of the price comes from the preparations that are needed in order to get the surface ready than the actual paint job, see if you can do the prep work yourself and have the body shop only do the paint job. If they are willing to work with you on this, it could significantly lower the cost of a professional paint job.
If you are okay with the paint color that currently exists on your jet ski but are looking to add a glossy finish and freshen it up, consider polishing it and adding a graphics kit. Polishing your jet ski will add to the vibrance of the colors and add a layer of protection against the elements. It may not diminish some of the imperfections that may exist on the paint job, but it will brighten the exterior for significantly less money and work than a full repainting job would require. Next find a graphics kit online and apply it to give your ski a newer edgy look.
Another option for those wanting to change the outside look of their jet ski is to get it professionally wrapped. This will entail completely covering the outside of the jet ski in a vinyl coating. This is typically less expensive than having it repainted, but will have to be done by a professional company. They will have all of the tools and machines necessary to print the wrap and adhere it to the surface of your jet ski.
Can you use spray paint on a jet ski? Yes, you can spray paint a jet ski. Your results may not be as good as using a professional paint, but they may be better than letting your ski look old and battered.
While painting a jet ski may require some hard labor and take a lot of time, being able to modify the look of your water vessel to resemble what you want can be a game changer! Be the envy out on the lake this summer with a new and improved jet ski color!
